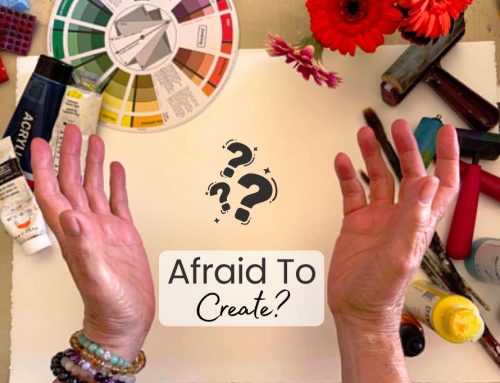
Have you ever pulled a print from your gelli plate and thought, “Well, that didn’t turn out as I expected”?
I certainly have, so if you have too, you’re definitely not alone.
One of the wonderful things about gelli plate printing is that every print is an experiment. However, when your stencil designs aren’t showing clearly, your layers are becoming muddy or your prints aren’t behaving as expected, it can be frustrating.
The good news is that most problems can be traced back to just a handful of common mistakes. Once you know what to look for, it becomes much easier to understand what’s happening and improve your results.
In the video below, I walk you through five gelli plate printing mistakes beginners make (or challenges as I like to call them) and explain some simple ways to avoid them.
Whether you’re brand new to gelli printing or have been experimenting for a while, these tips should help you get more consistent and enjoyable results.
1. Using Too Much Paint
This is probably the most common mistake beginners make.
When a print doesn’t pull fromt the plate the way you expected, the natural reaction is often to add more paint. Unfortunately, more paint usually creates more problems.
Too much paint can cause:
- Muddy colours
- Loss of stencil detail
- Blurred textures
- Filled-in patterns
- Thick, sticky layers
When using stencils and masks, too much paint can quickly fill in the fine details, making your designs appear less defined than you intended.
One of the biggest surprises for many beginners is how little paint is often needed to create beautiful prints.
A thin, even layer usually produces much better results than a heavy application.
Quick Tip
Try using slightly less paint than you think you need. You can always add more gradually with additional layers.
2. Not Allowing Enough Drying Time
Gelli printing is exciting because it encourages experimentation and layering.
However, it’s very easy to become impatient and move on to the next layer before the previous one has dried sufficiently.
When layers are still wet, colours can blend unintentionally and details can disappear. The result is often a muddy print where everything seems to merge together.
Allowing layers time to dry can make a huge difference to the clarity and definition of your finished print.
Quick Tip
If your prints are consistently looking muddy, try slowing down between layers and see if it improves your results.
3. Choosing the Wrong Paper
Paper plays a much bigger role than many people realise.
Different papers absorb paint differently, release from the plate differently and create different effects.
What many beginners don’t realise is that the “best” paper often depends on what you want to do with the print afterwards.
For example, a paper that works beautifully for collage may not be the paper you’d choose if you want to create greeting cards, art journal pages or finished pieces of wall art.
Rather than searching for one perfect paper, think about the type of project you’re creating and choose a paper that supports that goal.
Part of the fun of gelli printing is experimenting with different surfaces and discovering which papers suit your favourite techniques and projects.
Quick Tip
When you find a paper you like, make a note of what you used it for. Over time you’ll build a collection of favourite papers for collage, cards, journals and other creative projects.
4. Ignoring Temperature and Humidity
This is one of the least talked-about factors in gelli printing, but it can have a significant impact on your results.
Acrylic paint behaves differently depending on the conditions in your workspace.
On a hot, dry day, paint may dry much faster than expected. On a cool or humid day, it may remain wet for much longer.
Sometimes a technique that worked perfectly last week suddenly seems difficult for no obvious reason. The environment may be playing a bigger role than you realise!
Quick Tip
If your usual techniques aren’t behaving as expected, consider the temperature and humidity before assuming you’re doing something wrong.
5. Don’t Give Up Too Soon
This may be the most important mistake on the list.
Every experienced gelli printer has created prints they weren’t happy with.
The artists who improve aren’t the ones who avoid mistakes, they’re the ones who stay curious enough to keep experimenting.
Many prints that initially seem disappointing can become beautiful collage papers, interesting backgrounds or the starting point for a completely new idea.
Sometimes the print you dislike today becomes the piece you love most next week.
Quick Tip
Keep your unsuccessful prints rather than throwing them away. They often become valuable creative resources later.
Remember: Every Print Teaches You Something
One of the reasons so many people fall in love with gelli plate printing is that there are very few true failures.
Every print teaches you something about paint, paper, layering, colour and technique. As you gain experience, you’ll begin to recognise what’s causing certain results and you’ll develop your own preferences and creative style.
The goal isn’t perfection.
The goal is learning, experimenting and enjoying the process.
Want to Learn Gelli Printing Step-by-Step?
If you’re new to gelli printing and would like a simple, beginner-friendly approach, I’m currently creating a new course designed specifically for beginners.
The course will cover the foundations of gelli printing, help you avoid common frustrations and build confidence with your printing techniques.
If you’d like to be among the first to hear when it launches, join the wait list below.
Frequently Asked Questions
Why do my gelli prints look muddy?
Muddy prints are often caused by using too much paint or adding new layers before previous layers have had time to dry.
How much paint should I use on a gelli plate?
Most beginners use more paint than necessary. Thin, even layers generally produce cleaner prints with better detail.
What paper works best for gelli printing?
There isn’t one perfect paper for every project.
The best paper often depends on what you plan to do with the print afterwards. Papers that work well for collage may not be the best choice for greeting cards, journal pages or framed artwork.
Experimenting with different papers is part of discovering what works best for your style and creative goals.
Do the conditions in your home or studio affect gelli plate printing?
Yes. Temperature and humidity can affect drying times and how paint behaves on the plate.
What should I do with prints I don’t like?
Keep them! Many “failed” prints become useful collage papers, backgrounds or elements in future projects.
Final Thoughts
If you’ve been struggling with disappointing prints, don’t be discouraged. Most gelli plate printing problems have simple explanations, and once you understand the causes, they become much easier to solve.
Try making one small adjustment at a time and see what changes.
Most importantly, keep printing, keep experimenting and don’t be afraid to make mistakes.
After all, some of the most interesting prints happen when things don’t go exactly to plan.